
Welcome to iPhone Photography 101: how to perfect your iPhone photography without spending big bucks on even bigger equipment.
As much as I love my DSLR, sometimes the best camera is the one you have in your pocket.
And for the longest time that was my iPhone. I mean, I still use my iPhone for photos when I’m traveling. I appreciate the convenience (especially when my DSLR battery dies mid-trip).
So grab a seat (and snap a photo). In this iPhone Photography 101 class, I’m going to be showing you how I take iPhone travel photos for my blog and Instagram.
P.S. All the photos in this guide were taken on an iPhone 6 (the smartphone I have, probably should have upgraded, and use every day). I’ve also included the before and after pictures so you can see the effects of these tips!
Disclosure: Heads up, this post contains affiliate links, which means Passport To Eden may get a commission (at no extra cost to you) if you make an online purchase. Don’t feel pressured to buy anything. We still love that you’re here, reading our content (side note: we suggest getting a coffee or tea first because our blog posts tend to be long). You can read our full affiliate disclosure here to find out more.
iPhone Photography 101: Basics


How Do You Adjust The Exposure On An iPhone?
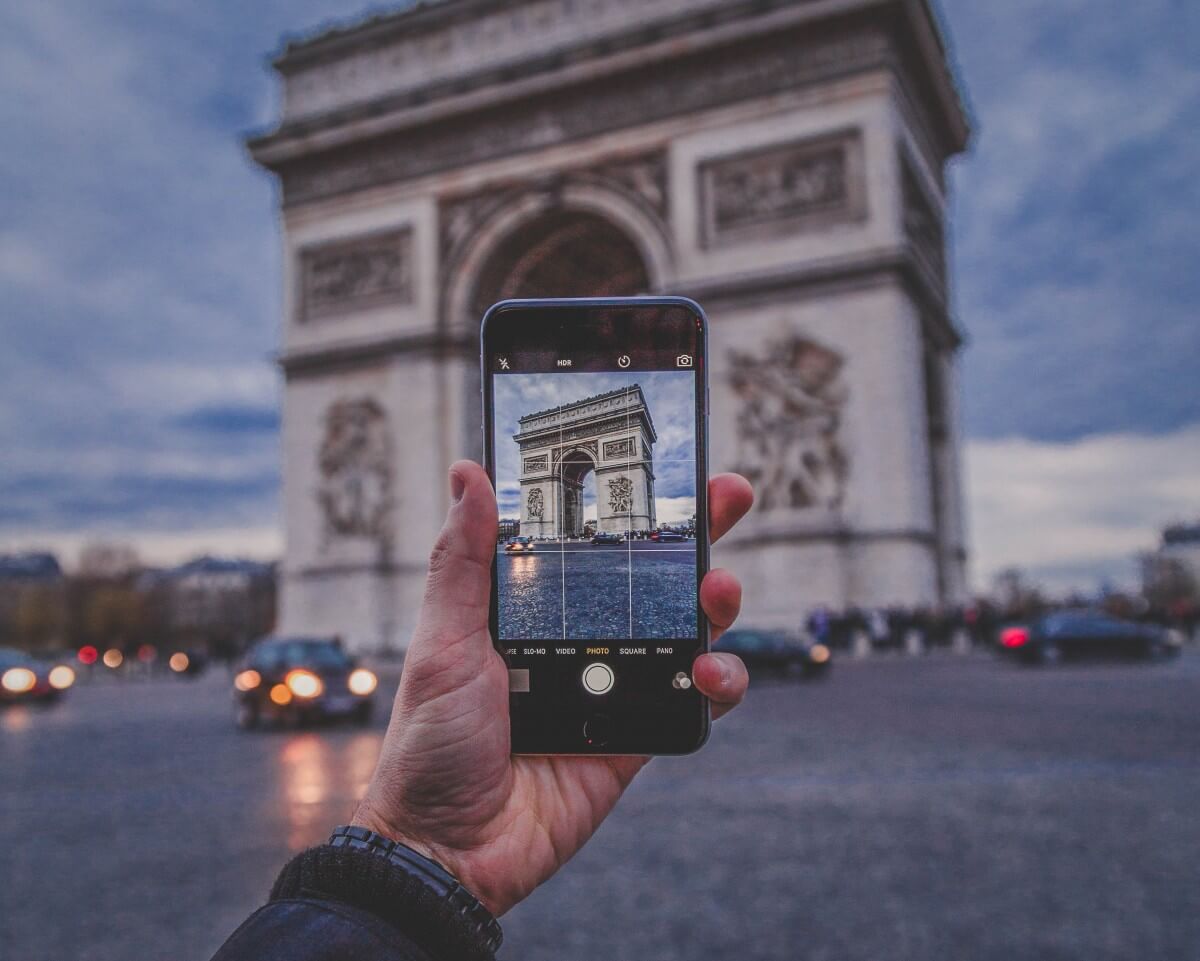
Depending on how much natural light is present, you probably want to adjust the exposure.
Go to the Camera app and simply slide your finger across the iPhone screen up (for increased brightness) or down (for decreased brightness).
This adjustment can make your pictures softer or harsher, depending on the feel you are looking for. Once you have a set exposure, be sure to lock that setting as well as your focus.
Behind The Photo
As you can see above, I like to make subtle changes that feel natural. But you can go for any style you like!
How Do You Create The Illusion Of Depth Of Field?


The AE/AF lock is a simple, often overlooked, iPhone photography technique. Just press your finger against the iPhone screen (right where you want to focus) and hold down until the gold letters AE/AF pop into place.
Watch as the background blurs just a little. By toying with the exposure and focus, you can create the illusion of a shallow depth of field, typical of DSLR images.
This style of photography allows the subject to stand out without an overly distracting background.
Behind The Photo
Although I edited the picture above in Lightroom (hence the color change), you can see that the AE/AF lock technique smoothed out the clouds and water giving a tiny depth-of-field effect.
How Do You Avoid Motion Blur?


Sometimes, if you are trying to take a picture of a bird soaring across the sky or a dog running (I’m not sure where these examples are coming from – bare with me), it is easy for your shots to become victims of motion blur (however close you get to the subject, the pixelated quality is inevitable).
In this case, meet your new best friend – Burst Mode. Hold down on the shutter button to take a speedy series of pictures, all with minimum blur.
Behind The Photo
The MEERKAT in the photo above WAS MOVING ALL OVER THE PLACE. BUT WITH BURST MODE, I WAS ABLE TO CAPTURE a RARE MOMENT: HIM SITTING STILL, LOOKING AHEAD.
To Zoom Or Not To Zoom? Answered.


I usually don’t zoom in while taking iPhone pictures.
The pictures lose bits of quality. Instead, I try to get as close to the subject as I can.
Behind The Photo
can you believe these two pictures are of the same area? i still can’t. i zoomed in a little too much (eep) on the first one. i was trying to take a photo right off the highway (i didn’t want to climb all the way back down to the river). but the walk down was worth it – look at the difference between the photos!
iPhone Photography 101: Framing


How To Get Grid Lines On The iPhone?
I love using grid lines on the iPhone because I personally struggle with the rule of thirds.
To enable the grid, go to Settings > Photos & Camera > Grid Toggle On. Now, line up your subject along one of the vertical or horizontal lines for a more visually pleasing image.
Behind The Photo
The picture above shows what happens when I try to guesstimate grid lines (it’s bad. really bad). BUT WHEN THERE’S A GRID, I’M ABLE TO ALign MYSELF (and the frame) to CREATE A more aesthetic IMAGE.
Is Negative Space Good Or Bad?


Negative space is the area around and between the subject. When a photo is cluttered, negative space can help you focus your image.
My go-to “negative spaces” are:
- clear skies
- solid colored walls
- tables (for flat lays)
iPhone Photography 101: Styling

How Do You Find Your Photography Style?
Don’t be afraid to go out of the norm when you frame a shot. Go after your gut feeling. This is your work and your art.
Make your iPhone camera your playground. And remember, iPhone photography is whatever you want it to be. There is no right and wrong. It is about how you feel in a moment.
After over a year of experimenting, I realized that brightly colored, slightly underexposed photos represent my style best!
Behind The Photo
One of my favorite pictures of Niagara is the one above. Why? It doesn’t tell a story of immense power and intensity. Instead, it weaves a tale of fear and clinging isolation.
Do You Need To Add People To Your Images?
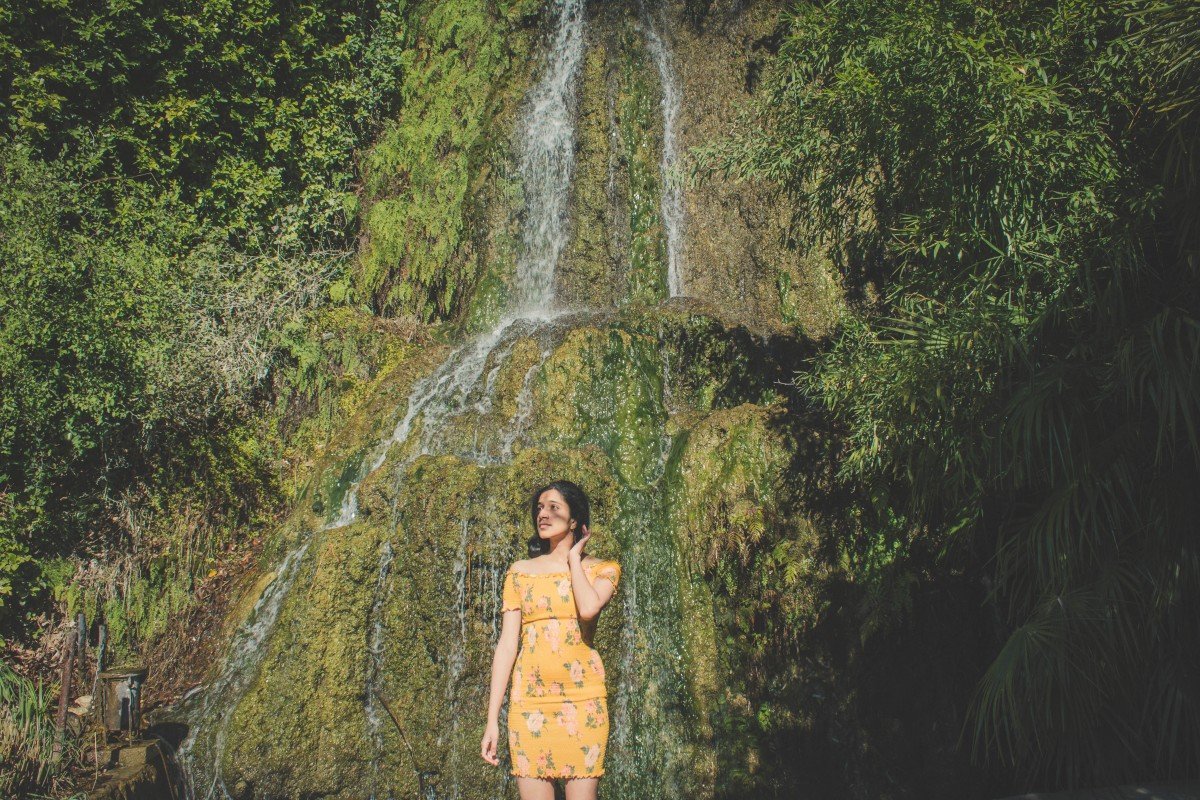
Your subjects don’t have to consist solely of inanimate objects (as I once believed). People add an extra dimension to any story.
Their expressions, their body movements, and their positions can dramatize or subdue a scene. But they shouldn’t clutter it. Unless you want to make a statement about how pervasive selfie-taking mobs are (I actually saw this photo in a magazine once and loved it), people are meant to complement not take over the scene.
Behind The Photo
I felt like the photo of the waterfall was a little flat by itself so i stepped into the frame to add a focal point.
iPhone Photography 101: Equipment
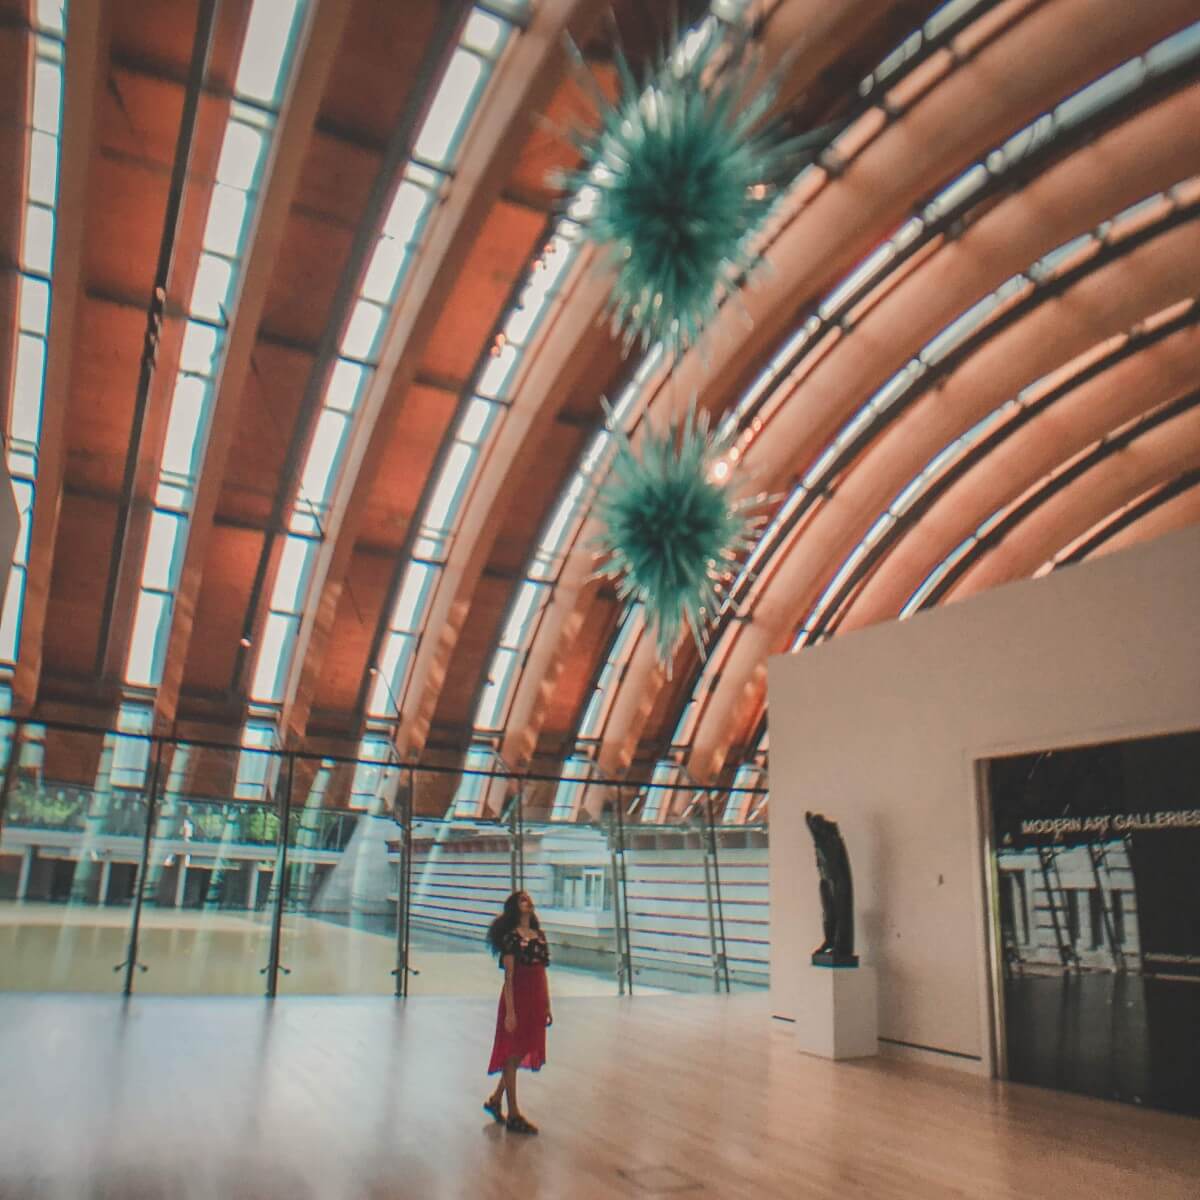
Do You Need Equipment To Take Good iPhone Photos?
Nope. Not at all. I sometimes use a gimbal (I purchased a cheap DJI Osmo knockoff that bugs out sometimes but overall works amazingly well for the price) or an Olloclip to stabilize and enhance my photos.
Behind The Photo
As you can see, the olloclip blurs the edges of a photo. it also added random blue (teal after my preset) spots all over the photo, which is WHY I DON’T USE IT VERY MUCH.
Is Lightroom Really Worth The Investment?


It depends! There are a lot of amazing free apps like VSCO, A Color Story, and Snapseed that can help you tweak your vacation photos and make them shine.
I 100% recommend Lightroom (Classic not CC) if you are a blogger or creative trying to build a brand. The reason: presets (a way to save settings).
I don’t buy any blogger presets because I’m of the mindset that your photo style is part of your brand (having a unique editing style can help set your brand apart). But if you’re feeling lost in the Lightroom world, you can always buy a preset (Creative Market is an amazing cheap resource for this) and build on top of that.
I use several different presets for all my photos (although they took me hours to create at first, they save me so much time now).
And I learned everything about Lightroom via YouTube. I’ll link the exact videos I watched below!
Did you enjoy this iPhone Photography 101 course? Let me know if you found these iPhone photography tips useful! As always, I love hearing from you.
I dont have an iPhone but as a photographer myself i do find it easier to take photos with my phone when im not doing a shoot of course 🙂 and these are great tips and i totally agree you can definitely tell your story with your phone, great photos!
Taking a photo with a phone can be so much easier (I love my DSLR, but it is often difficult to carry around and by the time I’ve changed lenses and adjusted everything, a moment I was hoping to capture can easily get lost) xx – Anshula
I’m always looking for ways to improve my photography…so these are super handy tips. I’m continually amazed by how impressive a photo I can take from my iPhone.
Yes! The iPhone camera is very impressive! For an inbuilt camera, it is quite amazing! xx – Anshula
These are great tips. I’ve used my iPhone and shot a couple of photos that I’m truly proud of and one that even went as part of our Christmas Card collage. However, I’d like to shoot better shots with it. These tips are wonderful!
-Beth
http://www.TheStyleBouquet.com
Thanks for these detail tips! I was not aware of such things before going through your post. Great photos!
I never zoom in with my iphone either because the quality goes down so dramatically. Lovely images
Thank you so much! xx – Anshula
These are great tips! I love the suggestion of burst mode for fast moving objects.
Thank you! I first discovered Burst Mode when I tried to take a photo of fast moving water and have been hooked ever since! xx – Anshula
Completely agree with your tip about zooming in. I find it degrades the quality of phone photos really quickly!
Yes! Hopefully, I really hope the issue is fixed in later models. 🙂
Oh! Now I can improve my photography skill using iphone.. 🙂 tq~
I’m glad you found these tips helpful! xx – Anshula
Wow… Ya article was really helpful
Especially your tip on zooming in..
Quite helpful
I’m always looking to find more photography tips, so this helps! thank you.
Glad you found them useful! xx – Anshula